Front Brakes Upgrade to RX7-E-FD3S
16th February 2004
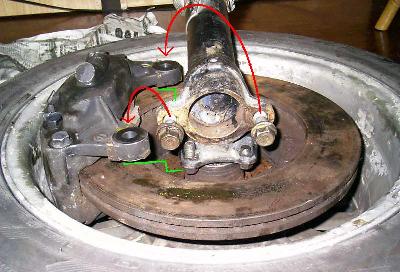
It is easier to see from the bottom how close things are.
The green color lines roughly shows how the new caliper bracket will be.
The red arrows shows the caliper's bolt - currently placed at where you see so that it will not get lost and serves as a good mock-up of the obstruction around the lower arm areas.
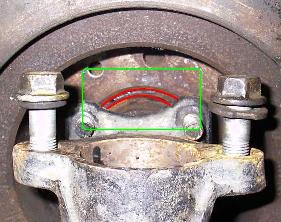
There is a circular gap between the rotor to the hub. The new holes on the rotor to be screwed through onto the hub will have to be checked carefully.
Else a ring will have to be machined to fit and glued together using Epoxyclay Steel as flatly as possible. Not difficult. Lets see in the future if this is needed. Lets hope not.
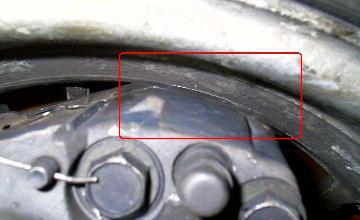
The caliper is touching the rim's internal. This is for sure. A solution would be to reduce the rotor's diameter by 10 mm total. 5 mm on each side. This will definitely clear it. No doubt about it.
In fact 6 mm of total reduction may be enough instead of 10.
ACOUSTICS SECTION AUDIO SECTION CAR SECTION
HOME - Technical Website for Acoustics, Audio and Car
 Malaysia
Boleh
Malaysia
Boleh